Register boot layout: from a floor, wall or ceiling register to a round duct, in inches
Updated on 28 October 2026
A register boot takes a round duct to the rectangular opening of a floor, wall or ceiling register. The Angular Boot page lays out the boot whose duct comes in from the side, running along under the floor: set the page to inches and every result comes in fractions to the nearest 1/16 in, the thickness field takes a gauge from a list, and a free account adds the full-size template on Letter sheets and the DXF.
The boot whose duct comes straight up from below is a square to round, on another page. Both are here: what each lays out, what to measure, a worked example and what the pattern leaves for you to add.
What the Angular Boot lays out
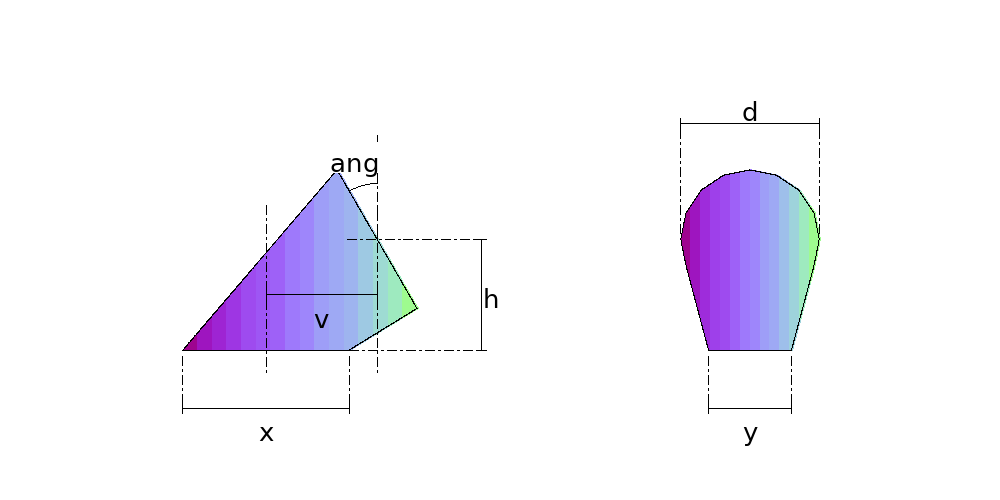
A transition from a rectangle, the register opening, to a round duct that runs parallel to it: the duct lies at a depth H below the register face, and the boot ends on a cut across the duct. A square cut gives an upright round end, the plain end boot, where the duct or a collar connects. An angled cut gives a sloping end, which is an ellipse rather than a circle; the duct then has to be cut at the same angle, and that cut is the Truncated Cylinder page, with the same diameter and angle.
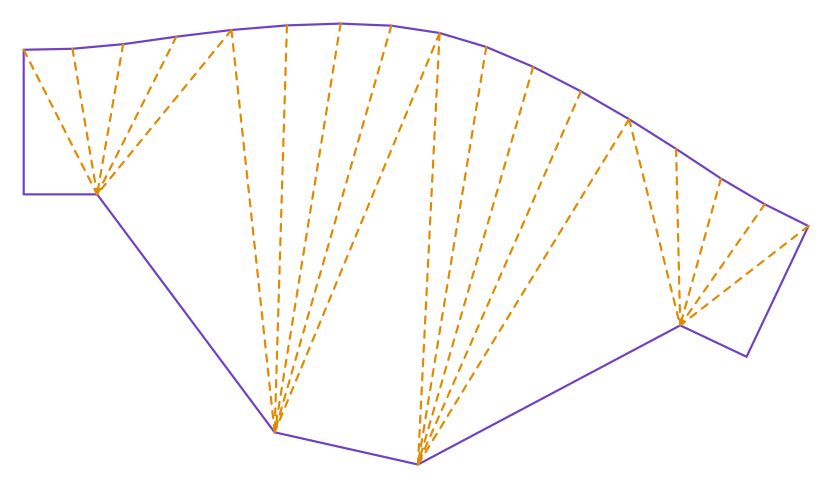
Like the other transitions here, the boot is four flat triangles, one on each side of the rectangle, and four fans at the corners. On the two sides that run along the duct the flat triangle cannot meet the round end smoothly, so the boot takes a crease on each of them; the note on the result says where to mark it. The creases are part of the boot, not a fault in the pattern.
What to measure
| Field | On a register boot |
|---|---|
| X, the side along the duct | The register size in the direction the duct runs: 10 for a 4 × 10 register with the duct coming in at one end. |
| Y, the side across the duct | The other register size: 4 in the same case. |
| D, the round duct | The duct size: 6 for 6 in duct. It can be wider than Y; a 6 in duct on a 4 in wide register is normal. |
| H, to the duct centreline | From the register face, the plane of the rectangle, to the centreline of the duct. It has to be more than half of D, so that the whole duct is below the face. |
| V, the offset | Along the duct, from the middle of the register opening to the centre of the round end. Half of X puts the round end right under the end of the opening; more puts it past the end. |
| ANG, the cut angle | 0 for a square cut and an upright round end; more slopes the end. |
| DV, divisions | How many points the round end is divided into, a multiple of 4. 16 is the page's own. |
| Thickness | The gauge, from the list. |
A register is sold by the size of the duct opening it drops into, not by its face: a 4 × 10 register fits a 4 × 10 opening, and its face is bigger. That opening is the rectangle of the boot. Type decimals: 5.5 for 5-1/2 in.
Worked example: a 4 × 10 floor register on 6 in duct
A 4 × 10 in floor register (102 × 254 mm), fed by a 6 in duct (152 mm) that runs under the floor and comes in at one end. The duct centreline is 5-1/2 in below the floor (140 mm), and the boot ends 6-1/2 in from the middle of the register (165 mm), 1-1/2 in past the end of the opening. Square cut, 26 gauge.
| Field | Value |
|---|---|
| X and Y | 10 and 4 |
| D | 6 |
| H | 5.5 |
| V | 6.5 |
| ANG | 0 |
| DV | 16 |
| Thickness | 26 gauge, 0.0217 in (0.55 mm) |
| Plate | 18 × 14-11/16 in (457 × 373 mm) |
| Full-size template | 6 Letter sheets |
The result carries the notes for this part: where to mark the two creases, and that the angle between faces changes from crease to crease, so the boot is formed to fit rather than folded to one angle.
Straight boots, ceiling boots and the rest
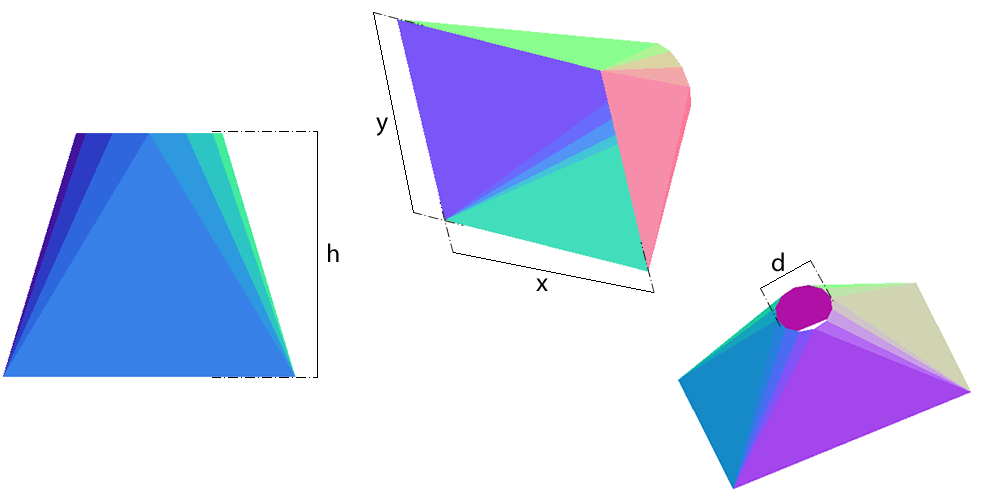
- Straight boot, the duct coming straight up from below, centred: the Square to Round page, with the register size as X and Y, the duct as D and the depth of the boot as H. It takes a duct wider than the register's narrow side: a 4 × 10 register on 6 in duct, 6 in deep, in 26 gauge, is a 19-3/8 × 17-3/4 in plate (492 × 450 mm).
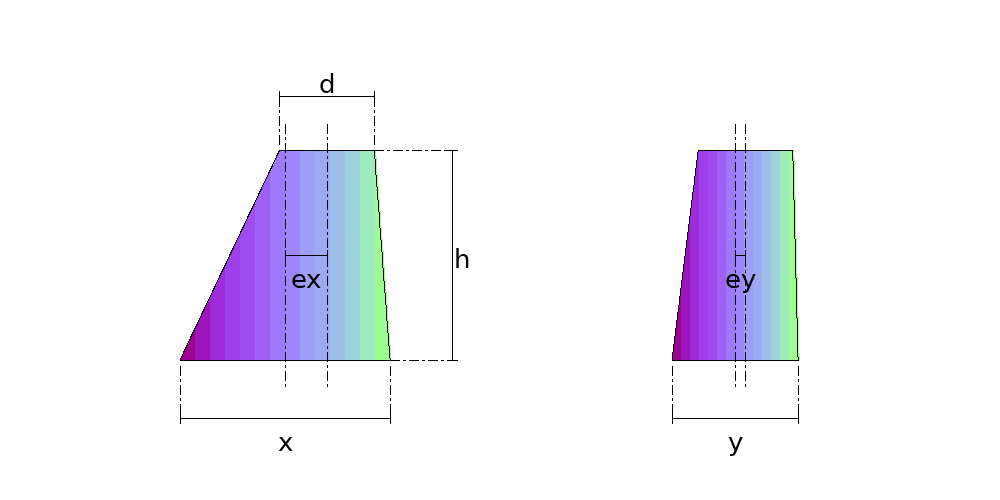
- Straight boot with the duct off centre: the Eccentric Rectangle to Round page, but only when the round fits inside the register opening seen from above, so not for a 6 in duct under a 4 in wide register.
- Ceiling boot with the duct coming in from the side: the same Angular Boot, upside down. With the duct coming down from above: the Square to Round, upside down.
- Box boot, a plain box with a collar in its end or its bottom: not a transition. Its sides are flat panels and its collar a plain band, and no page here lays out the box with its hole.
- Stack head, from rectangular wall stack to the register: not covered.
What the pattern does not include
- The tabs on the rectangular end that bend over the edge of the floor or ceiling opening to hold the boot. Add them along the sides of the rectangle.
- The crimp or bead on the round end, and any collar. A straight collar is a plain band, on the Cylinder page.
- Seam allowances. The pattern is net, with the seam edges butted: a Pittsburgh, a snap lock or a lap for screws goes on along the seam edges, from the chart of your lock former.
For plasma or laser cutting, the free account exports 1 part a month in DXF; unlimited DXF export is the paid full access. A boot of the example's size prints on six Letter sheets, so for a few boots the paper template is the quicker route, and for a run of them the DXF.
Frequently asked questions
- What size boot does a 4 × 10 register take?
- One with a 4 × 10 in opening: registers are sold by the size of the opening they drop into, not by their face. The round end is the duct that feeds the register, which the duct design sets from the airflow the room needs.
- Can the round duct be wider than the register's narrow side?
- Yes. A 6 in duct on a 4 × 10 register is a normal boot, on the Angular Boot page with the duct from the side and on the Square to Round page with the duct from below.
- Why does the boot pattern have creases?
- On the two sides that run along the duct, no point of the round end has its tangent parallel to the side, so the flat face and the curved part meet at an angle instead of smoothly. The crease is part of the boot, and the note on the result says to mark it.
- Where do I measure the depth and the offset from?
- The depth, from the register face, the plane of the rectangle, to the centreline of the duct. The offset, along the duct, from the middle of the register opening to the centre of the round end.
- Does it do ceiling boots?
- Yes: a ceiling boot is a floor boot upside down. Duct from the side, the Angular Boot; duct from above, the Square to Round.
- Is the boot layout free?
- The figures and the drawing need no account. The full-size template takes a free account, which also exports 1 part a month in DXF; unlimited DXF export is the paid full access.
Parts in this guide
Other guides
- How to develop a cone (frustum) in sheet metal: formula, sector radii and angle, step by step
- Lobster back bend calculator (segmented 90° elbow): gore angles, cut heights and how many plates
- Pipe saddle calculator and development: how to lay out a pipe-to-pipe branch (tee) at 90 and 45 degrees
- Square to round transition: development by triangulation, step by step
- The neutral axis of plate: why every development uses D − t, and the bend deduction
- Sheet metal glossary: the terms of marking out and pattern development in plate fabrication
- How we check the Planichapa calculations, and who is behind them
- LITIO alternative: Planichapa develops sheet metal parts in the browser, nothing to install, now that LITIO2 is no longer sold
- How to lay out a mitre-cut pipe: paper template, sine wave and ordinate table
- Plate 'n' Sheet alternative: Planichapa develops sheet metal parts in the browser, with the price on the page
- Steel plate weight calculator, weight per m², gauges and stock plate sizes: table and formula
- Pipe ovality: a calculator, the formula, a worked example, the limits the codes use and how to measure it in the shop
- Sheet metal pattern development software: how to choose, and what changes between a desktop program, a phone app and an online calculator
- Eccentric and concentric reducers: which one to use and how each one develops on plate
- Roller chain size chart: ANSI, ISO 606, motorcycle and bicycle chain pitch and roller diameter
- Sprocket dimensions: pitch diameter, outside and root diameter, tooth form and a pitch diameter chart
- Bolt circle layout: the position of each hole, the chord between holes and a chord chart
- Chain length and sprocket ratio: the formulas, a worked example and how many links to cut
- Screw flight calculator: the flat blank of a screw conveyor flight (auger), with the formula and a worked example
- Plate rolling calculator: the blank length of a rolled shell, with the formula, a chart and a worked example
- Tube notching template generator: a printable coping template for any tube, angle and offset
- Dished head calculator: depth, volume, blank diameter and weight of torispherical, 2:1 elliptical and hemispherical heads
- Cone template generator: a printable full-size cone template for hoppers, funnels and reducers
- Pie cut calculator for exhaust and tube bends: saw angle, pie lengths and a wrap-around template
- Duct transition layout: square to round duct, centred, offset or flat on one side
- Pipe template, printable at full size: tee saddle, 45° lateral and mitre cut for every pipe size from NPS 1/2 to 12
- Plenum box and plenum transition layout: the sides, the offset and the round outlet